Monday, March 31, 2014

Stuffed Shells (with Kale, Ricotta, Parmesan, and Mozzarella)

Cheese and pasta. It doesn't get much better than that. Unless you add kale - and then cheese and pasta become extra delicious, and somewhat healthy (right?).

I made these stuffed beauties for a catering client last week. He loves one-pot, easy-to-reheat meals that make a lot of servings, so I thought these stuffed shells would do the trick. And they did.

The kale and cheese filling is super flavorful, and after being topped off with some homemade tomato sauce - all bets (and diets) are off.

Stuffed Shells | The Economical Eater

Stuffed Shells | The Economical Eater

Stuffed Shells | The Economical Eater

Stuffed Shells
Yields: 20-22 stuffed shells

-1 teaspoon plus 2 tablespoons olive oil, divided
-1/2 (12-ounce) box jumbo pasta shells (20-22 shells)
-2 cups diced onion
-1 clove garlic, minced
-2 cups baby kale, roughly chopped
-Salt and black pepper
-15 ounces ricotta cheese
-2 large eggs
-1 cup grated Parmesan cheese
-2 cups grated mozzarella cheese, divided
-1 tablespoon extra-virgin olive oil
-1 teaspoon dried basil
-1 teaspoon dried oregano
-Pinch of crushed red pepper flakes
-Tomato sauce

Directions:
1.) Preheat oven to 350 degrees. Lightly grease a 13 x 9 baking dish with 1 teaspoon olive oil.
2.) Bring a medium pot of salted water to a boil. Add the pasta shells and cook until al dente, about 10 to 12 minutes, stirring occasionally. Drain and rinse under cold running water. Drain again.
3.) In a medium skillet, heat 1 tablespoon of olive oil over medium heat. Add the onions and garlic and cook, stirring, until very soft, 6 to 7 minutes. Add the kale and cook until wilted, about 3 minutes. Remove from the heat and season with salt and pepper.
4.) In a large bowl, combine the ricotta cheese, eggs, Parmesan, and 1 cup of the mozzarella. Add the kale mixture, the remaining tablespoon of olive oil, basil, oregano, and crushed red pepper flakes, and stir to combine thoroughly. Spoon about 2 tablespoons of the kale-ricotta filling into each cooked pasta shell. Place the filled shells in the prepared dish.
5.) Pour tomato sauce over the filled shells and top with the remaining 1 cup of mozzarella cheese. Bake, uncovered, until bubbly, about 20 minutes. Remove from the oven and let rest for 5 minutes before serving.


Stuffed Shells | The Economical Eater

I made a few extra than this recipe calls for - hey, I had to taste the final product! - and, I must say, these are some tasty pasta shells. I loved how the kale and onions helped balance the richness of the cheeses, while the tomato sauce is just light enough to prevent this from being an overly heavy dish.

What's your favorite one-pot dish?


Wednesday, March 26, 2014

Flights and Flatbreads at Seasons 52

Last week, I met up with my cousins for dinner in Burlington. We were all eager to go to Seasons 52 (after all, I had quite the meal there the last time I visited), so that's where we decided to meet.

Upon arriving, one of my cousins informed me of their Flights & Flatbreads deal - and I was immediately on board. Basically, it's Seasons 52's version of happy hour. You get to try a flight of three Remarkable Reds or Spectacular Whites, followed by a full pour of your favorite. You also get to pair your wine choices with one of Seasons 52's flatbreads - all for $15. (Or, you can get a flight and full pour of their Acclaimed Wine Series plus a flatbread for $20). Yeah...it's a good deal.

On this particular night, we all went with the Spectacular Whites (the chardonnay ended up being my favorite/my full pour).

Flights & Flatbreads at Seasons 52 | The Economical Eater

For my flatbread, I went with the Spicy Chipotle Shrimp Flatbread, topped with grilled pineapple, feta cheese, and roasted poblano peppers.

Spicy Chipotle Shrimp Flatbread at Seasons 52 | The Economical Eater

I mean, look how gigantic this flatbread was:

Spicy Chipotle Shrimp Flatbread at Seasons 52 | The Economical Eater

I think that plus [basically] two glasses of wine for $15 is quite the deal. It also helps that everything was good - including the service!

The best part about this evening - and all of last week, for that matter - was that I drove a Buick Encore to and from the restaurant. (Don't worry, mom - I only had two glasses of wine and an entire flatbread. I was responsible!). My friends at General Motors sent me this beauty to drive around in last week:

GM Buick Encore | The Economical Eater

The car also came in mighty handy when we were moving everything back into our basement after getting it redone.

GM Buick Encore | The Economical Eater

Yeah...let's just say this car made my poor little 2008 Ford Fusion look pretty darn boring.

Have you discovered any good restaurant deals lately? 

What's your dream car?

My Buick Encore rental was complimentary; all opinions are my own. 


Tuesday, March 25, 2014

Yasso Frozen Greek Yogurt Bars

Spring has finally sprung!

Yasso Frozen Greek Yogurt Bars | The Economical Eater

OK, it hasn't really sprung - considering snow is on the forecast for this evening - but I like to pretend. And what better way to celebrate spring than with tasty frozen bars to snack on?

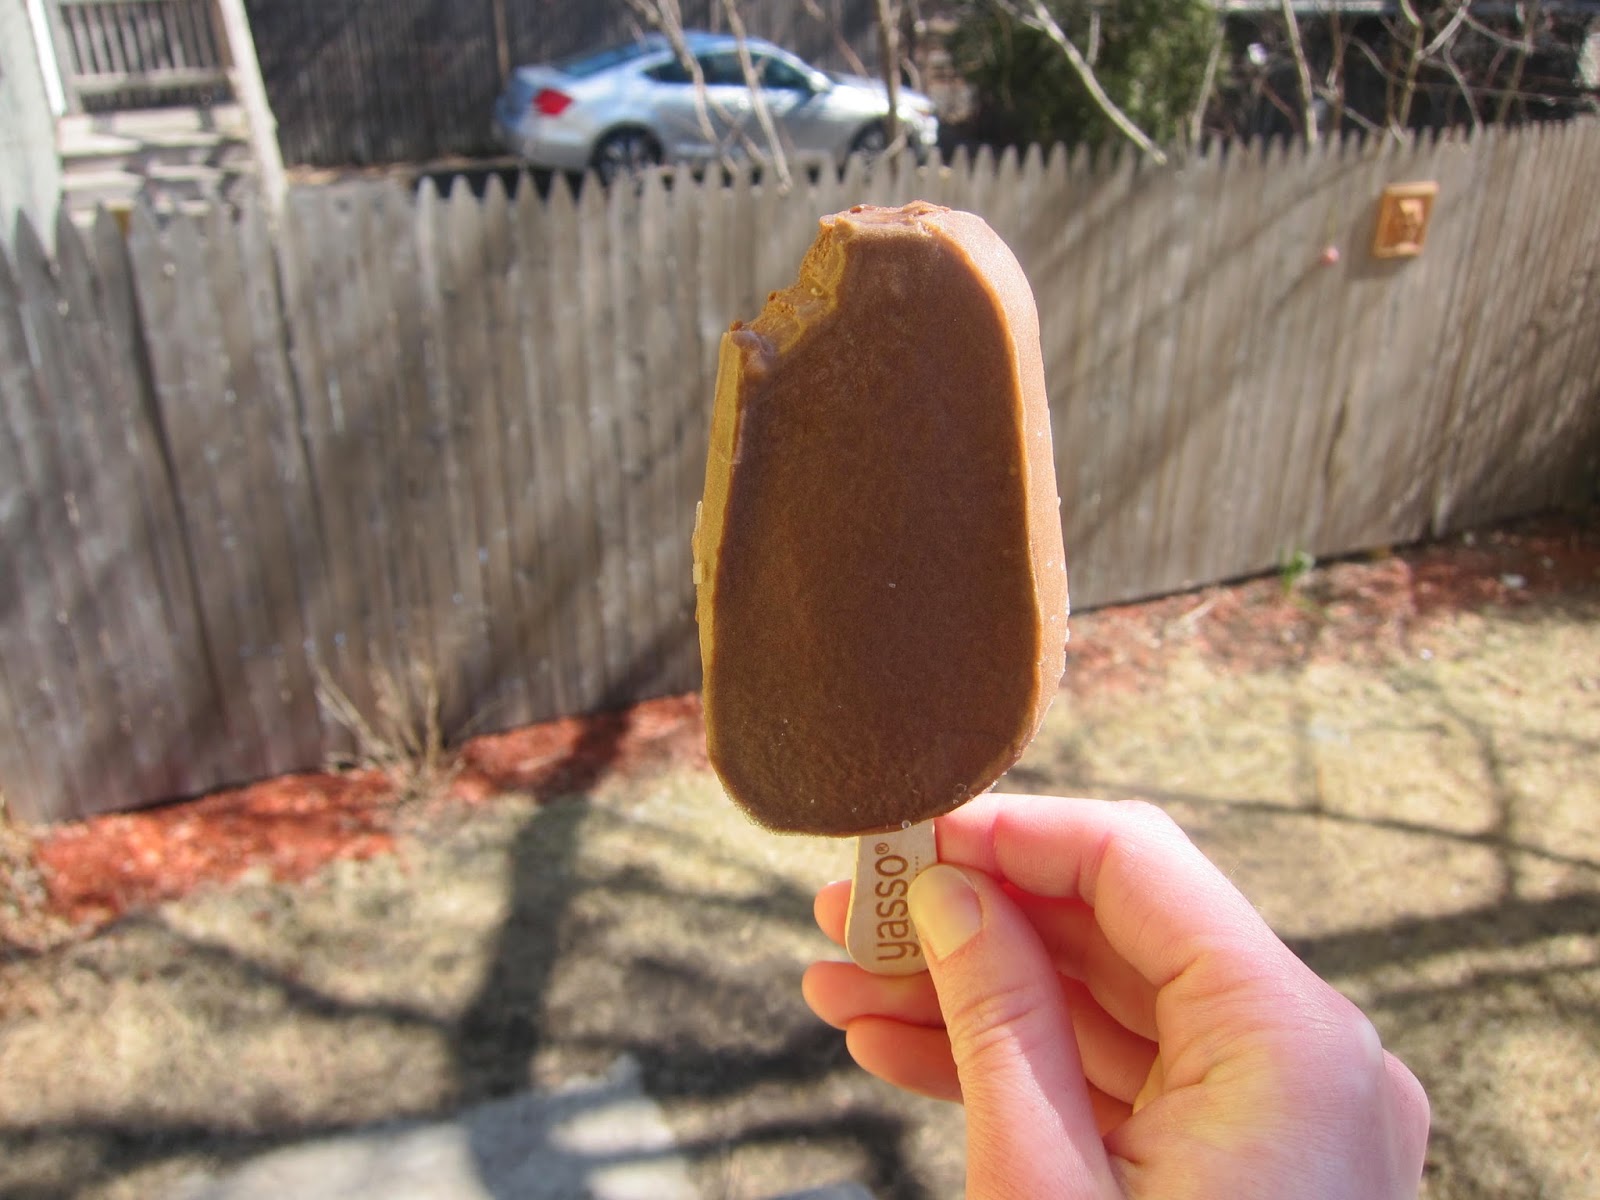
Yasso Frozen Greek Yogurt Bars | The Economical Eater

My friends at Yasso (who are based in downtown Boston) sent me a coupon to try their new Frozen Greek Yogurt Bars flavors, and after seeing kinds like Peanut Butter Cup and Sea Salt Caramel, I happily obliged. I was also happy to see that Yasso's bars are only made with natural ingredients, contain no artificial sweeteners, are low in calories and high in protein, and contain rBST-free milk. 

The flavor I decided to try was the Chocolate Fudge, which tasted almost like a grown-up Fudgsical. I say "grown-up" because of the tangy Greek yogurt flavor throughout - which also contributes to the 7 grams of protein per bar. On a [finally!] spring-like day, this chocolatey snack cured my sweet treat cravings, without totally blowing my sugar intake for the day. (Typically, when I have sweet snacks, my blood sugar goes haywire - but this bar didn't do that to me, thankfully).

The best part about these bars? The first handful of ingredients are recognizable: nonfat milk, Greek yogurt, sugar, milk protein concentrate, and cocoa powder. The few remaining ingredients scare me a bit (maltodextrin, "natural flavor," guar gum, and locust bean gum), but, besides the maltodextrin, the bars contain 2% or less of the remaining ingredients.

Overall, I think these bars make a great snack for the impending spring and summer days. And, thanks to the protein, they actually have some staying power so I you won't crash from a sugar high 30 minutes after consuming one. 

I found the Yasso bars right at my local Star Market/Shaw's, but here's how to find a store near you that sells them.

What's your favorite warm weather snack?

I received a coupon for this product, but all opinions are my own.


Monday, March 24, 2014

Blueberry Crumb Bars

My favorite fruit has to be blueberries. And when I can't get them fresh, I'm perfectly happy buying them frozen...and having a big ol' cup of them in my cereal almost every weekday morning.

Last week, I had an intense desire to bake (which, if you know me, is rare), and a ton of leftover frozen blueberries to use...and thus, these bars were born.

The garam masala isn't 100% necessary, but it does make an incredibly delicious difference in these bars. This dessert (or snack!) is not overly sweet, but is bursting with juicy blueberries complemented by the flavorful garam masala and the tangy lemon juice. 

Blueberry Crumb Bars | The Economical Eater


Blueberry Crumb Bars
Yields: 9 bars
Adapted from Damn Delicious
-3/4 cup granulated sugar, divided, plus extra for sprinkling
-2 teaspoons cornstarch
-1 tablespoon lemon juice
-2 cups frozen (or fresh) blueberries
-1 1/2 cups all-purpose flour
-1/2 teaspoon baking powder
-1/4 teaspoon garam masala
-1/4 teaspoon salt
-1 large egg yolk
-1 teaspoon vanilla extract
-1 stick unsalted cold butter, cut into cubes

Directions:
1.) Preheat oven to 375 degrees. Lightly coat an 8×8 baking dish with nonstick spray.
2.) In a small bowl, combine 1/4 cup sugar and cornstarch. Stir in lemon juice. Add blueberries and gently toss to combine; set aside.
3.) In a large bowl, combine flour, remaining 1/2 cup sugar, baking powder, garam masala, and salt. Add egg yolk, vanilla, and cold butter, using your fingers to work the butter into the dry ingredients until it resembles coarse crumbs.
4.) Spread 2/3 of the batter into the prepared baking dish. Spread blueberry mixture evenly over the bottom layer. Sprinkle with remaining 1/3 of the batter and a generous sprinkling of sugar (about 1 tablespoon).
5.) Place into oven and bake until lightly browned, about 35-40 minutes. Let cool slightly before cutting into bars.

[Print this recipe]

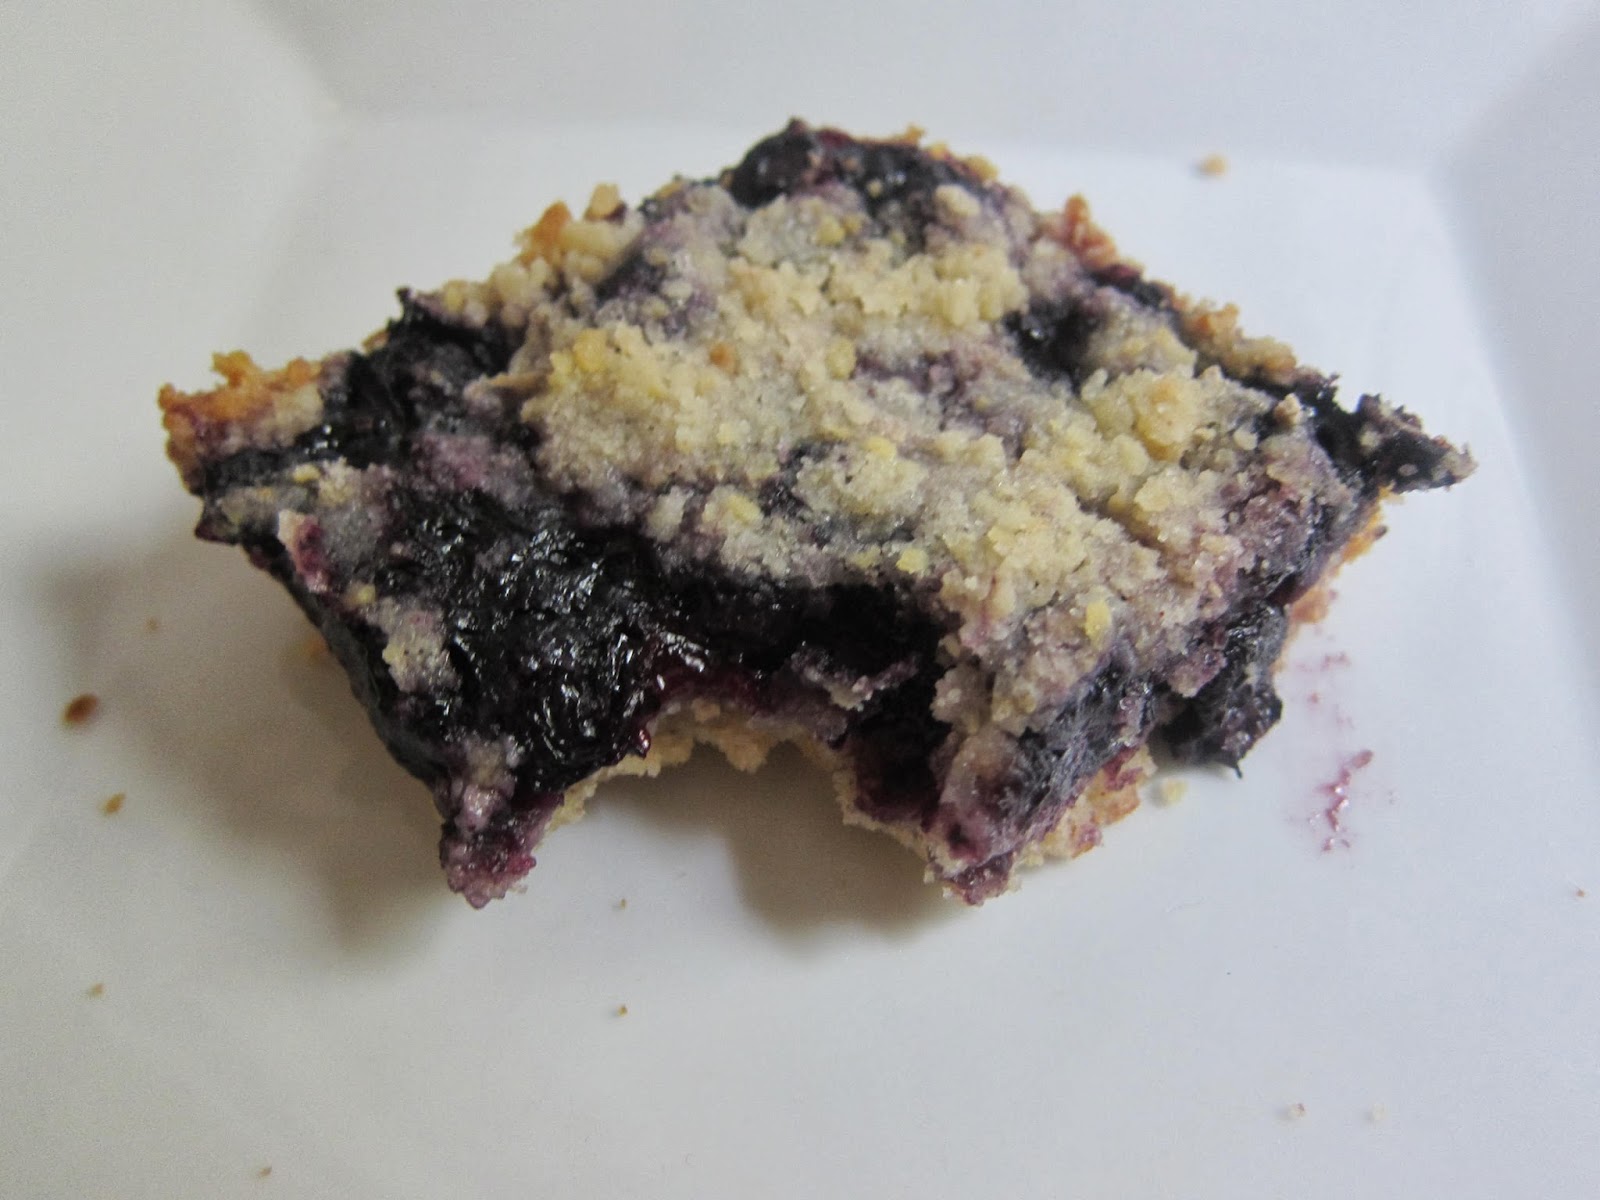
Blueberry Crumb Bars | The Economical Eater

Yup. So many delicious blueberries.

Blueberry Crumb Bars | The Economical Eater

Z and I aren't huge dessert people, but we loved that these bars provided a sweet treat without totally overpowering us with sugar. Given how tame they are, one of these bars would be great with a cup of coffee in the morning, or for a "palate cleanser" after dinner. (See what I did there?).

What's your favorite fruit?


Thursday, March 20, 2014

EHChocolatier in Somerville

I have a whole new respect for chocolate now.

EH Chocolatier in Somerville | The Economical Eater

Last week, I had the honor of attending a Beyond the Bar chocolate-making class at EHChocolatier in Somerville. Myself and a few other bloggers got to taste a whole lot of handmade, small batch chocolates, while learning a number of techniques for making exceptional chocolate-based confections.

First, a little back story: EHChocolatier was opened in 2010 by the two lovely ladies below, Elaine Hsieh and Catharine Sweeny.

EH Chocolatier in Somerville | The Economical Eater

Elaine and Catharine met while making a wedding cake for a friend, after years of careers in internal medicine (Elaine) and at Harvard University (Catharine). Both women also studied at the Cambridge School of Culinary Arts.

Elaine and Catharine put a heavy emphasis on freshness and flavor when it comes to their chocolates. All of their products are handmade in small batches, and no artificial flavors or preservatives are used. They even use classic techniques and make each chocolate by hand to create the ideal balance of flavor and texture. And after attending this class, I must say: whatever they're doing works.

EH Chocolatier in Somerville | The Economical Eater

Besides getting to taste a slew of chocolates at the beginning of the class, we also got to learn how to make Elaine and Catharine's silky ganache. 

EH Chocolatier in Somerville | The Economical Eater

Catharine showed us how to make a sultry ganache with butter, while Elaine filled us in on how to make a vegan ganache (simply use water vs. any dairy).

Then, Catharine showed us how they put the ganache into molds in order to make their chocolates.

EH Chocolatier in Somerville | The Economical Eater

EH Chocolatier in Somerville | The Economical Eater

EH Chocolatier in Somerville | The Economical Eater

EH Chocolatier in Somerville | The Economical Eater

EH Chocolatier in Somerville | The Economical Eater

EH Chocolatier in Somerville | The Economical Eater

From there, the large square of chocolate is cut into smaller, bite-size squares.

EH Chocolatier in Somerville | The Economical Eater

EH Chocolatier in Somerville | The Economical Eater

At this point, the squares are dipped into tempered chocolate. If you've ever tried to temper chocolate, you know it's quite the process. Elaine taught us a lot of great techniques for tempering chocolate successfully, including using a "spoon trick."

EH Chocolatier in Somerville | The Economical Eater

EH Chocolatier in Somerville | The Economical Eater

If the chocolate runs off the spoon, it's not quite ready. But if it becomes cloudy, it's also not quite right. The type of consistency you want is this:

EH Chocolatier in Somerville | The Economical Eater

It definitely takes some trial and error, but, thankfully, Elaine and Catharine don't have to temper by hand all day, every day. They have a machine to do that for them (although, they still have to test the chocolate every time to make sure it's at the right consistency). 

EH Chocolatier in Somerville | The Economical Eater

Once the tempered chocolate was perfect, we all got a chance to dip our own chocolate squares into it. (I failed miserably at this step, by the way. But it's actually quite easy).

EH Chocolatier in Somerville | The Economical Eater

After dunking our squares, we "painted" various designs on each one.

EH Chocolatier in Somerville | The Economical Eater

The end result comes out looking something like this:

EH Chocolatier in Somerville | The Economical Eater

Our class concluded with more chocolate samples. 

EH Chocolatier in Somerville | The Economical Eater

In addition to being able to taste a wide variety of quality chocolate, this class was also super informative. I really learned a lot when it comes how to make a fantastic ganache, as well as some great techniques for tempering chocolate. Learning how much work goes into small, bite-size pieces of chocolate also gave me a whole new respect for the craft. It also really helped that Elaine and Catharine clearly love what they do, are good at it, and also really enjoy working together. Their passion, creativity, and camaraderie was evident in each piece of their chocolate.

You can order any of EHChocolatier's chocolates online, or sign-up for any of their classes here

What's your favorite type of chocolate? Milk, white, or dark? I'm partial to dark, but let's be honest...I'll eat any of the above.

I attended this class at no charge, but all opinions are my own.


Wednesday, March 19, 2014

India Palace in Somerville

We love Indian food and we live in Somerville...so don't ask me how we just found out about India Palace.

I have a ton of Restaurant.com credit that I haven't used in...well, years...so when I saw India Palace on the list of local restaurants (that accept Restaurant.com gift cards), I quickly bought a certificate there. The restaurant had great online reviews, and Z and I are always down to try a new Indian place.

On a Wednesday evening the intimately sized restaurant was pretty empty, but the food and service left us wondering why.

Our meal began with the Palace Vegetarian Platter ($7.95), which consisted of pakoras, samosas, and aloo tikki. We also ordered a side of mango chutney.

#Vegetarian Platter from India Palace in Somerville | The Economical Eater

Mango chutney from India Palace in Somerville | The Economical Eater

Everything on the vegetarian platter was incredibly flavorful, well-seasoned, and fried to crispy - and non-greasy - perfection. The accompanying mango chutney was delightfully chunky, while still easy enough to scoop up with a spoon (or a samosa).

For my entree, I went with the Chole Saag ($11.95), made with chickpeas that are cooked with fresh spinach, onions, garlic, ginger, and Indian spices. I ordered my chole saag spicy, and it did have a nice kick to it without being overwhelming.

Chole Saag from India Palace in Somerville | The Economical Eater

I have to say that this is one of the best dishes I've had at a local Indian restaurant in a long time. The flavors were just spot-on, and the portion size was huge - Z and I had two meals worth of leftovers between our two entrees! (FYI, Z ordered the Shahi Paneer Korma ($12.95) for his entree - homemade cheese cubes sauteed with fresh ginger, garlic, onion, and tomatoes, then garnished with nuts and raisin - and loved it).

Of course, we also ordered a few different breads to have with our meals. I highly recommend the Broccoli Naan ($3.95).

All in all, we had a fantastic first meal at India Palace, and we will definitely be back. For the great food, friendly service, reasonable prices, and generous portions.

India Palace on Urbanspoon


Friday, March 14, 2014

Drink This: Jack's Abby Framinghammer

Before I met my craft beer-obsessed husband, my favorite beers were super light ales with an ABV of 5 percent or less. But once I discovered dark, stronger beers that taste like dessert, I quickly changed gears (or, beers! Sorry...).

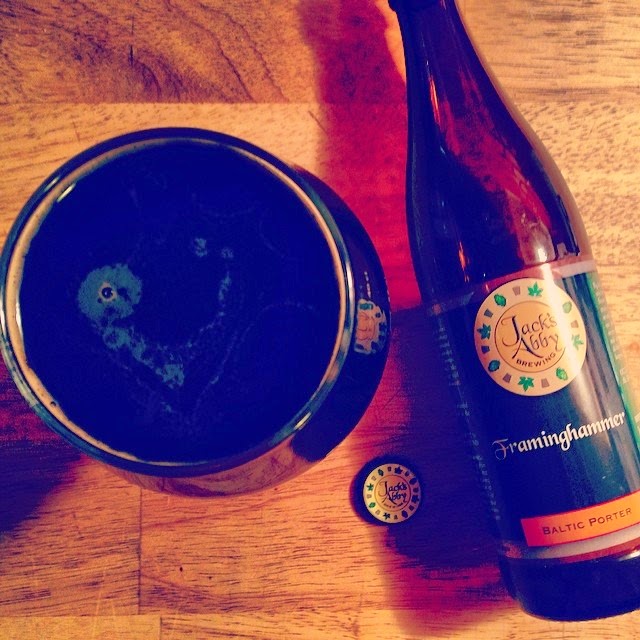
Jack's Abby Framinghammer | The Economical Eater

Jack’s Abby Brewing – located in Framingham, Mass. – is one local, family-owned brewery that fulfills my current beer cravings. Jack’s Abby’s beers are made with locally sourced ingredients when possible, and are preservative-free and unfiltered – all characteristics of a beer I wholeheartedly support.

One of Jack’s Abby’s beers inparticular – the appropriately named Framinghammer – is one of my go-to cold weather brews. This Baltic porter clocks in at 10 percent ABV, and boasts rich flavors like chocolate, caramel, vanilla, and coffee. The smooth, sultry mouthfeel is a result of a long conditioning period, and the brewers at Jack’s Abby add oats and brown sugar to the mix to enhance the beer’s silky texture.

The aroma of the Framinghammer is deceiving, as it’s roasted coffee notes don’t do the bold flavors of the brew much justice. However, every sip is convincing that this is one solid porter, which only gets better as it warms to room temperature.

The Framinghammer was released in December, and unfortunately isn’t on store shelves year-round. So, in other words, hurry and grab a bottle today! Jack’s Abby also releases several different versions of their original Framinghammer, including barrel-aged, coffee, and vanilla varieties (to name a few).

And, if you can't make it to Framingham anytime soon to try Jack's Abby's other great brews, Volante Farms in Needham gets many of the beers that are usually exclusive to the Jack's Abby tap room. (Volante's beer guy is friends with the brewers at Jack's Abby).

What’s your favorite cold weather beer? Would you like to see more beer reviews like this on The EE?


Thursday, March 13, 2014

Caramelized Onion BBQ Grilled Cheese

Last week, I attended an event put on by Blog and Tweet Boston - in conjunction with popchips and Kitchensurfing - at Workbar in Cambridge.

Workbar Cambridge | The Economical Eater

The event featured three Kitchensurfing chefs, who were competing to see who made the best dish that evening. The catch? Their dishes had to incorporate popchips in an innovative - and delicious - way.

Kitchensurfing chefs | The Economical Eater

The chefs above prepared a banh mi sandwich - appropriately named "A Vietnamese Banh Mi Sandwich & Popchips Had a Baby" - made with delicious pickled vegetables (they made me a vegetarian version)...and a bun made out of popchips. (They also incorporated popchips in several other ways, but the bun impressed me the most). Due to the taste and overall creativity, this was my favorite dish of the evening.

Banh Mi made with Popchips | The Economical Eater

Following the event, Blog and Tweet Boston challenged us bloggers to incorporate popchips in our own innovative recipes. Growing up, I loved putting chips in my sandwiches - that added crunch and salt just made every bite of a plain old sandwich that much more special. I haven't even thought to add chips to my sandwich as an adult...until I was faced with this popchips challenge.

But I didn't want to make just any old sandwich. I wanted to incorporate popchips' barbeque potato chips into a gloriously cheesy, melty, decadent grilled cheese sandwich. To start, I ground one bag of the chips in my spice grinder to help flavor and caramelize some onions. (You can also grind them by simply crushing them in the bag, if you don't have a spice grinder).

Barbeque Potato Popchips | The Economical Eater

The sandwich is then finished off with barbecue sauce, a dash of maple syrup, sweet pickles, and lots of cheese.

Caramelized Onion BBQ Grilled Cheese | The Economical Eater

Caramelized Onion BBQ Grilled Cheese
Yields: 2 sandwiches
-2 individual bags of Barbeque Potato popchips
-2 tablespoons olive oil
-1/2 yellow onion, sliced
-1 tablespoon barbecue sauce
-Dash of maple syrup
-4 slices sourdough bread
-4 slices muenster cheese
-6 bread & butter pickle slices

Directions:
1.) Pour one bag of popchips into a spice grinder and grind until finely grated. (Or, simply crush in the bag with your hands).
2.) In a medium saute pan, heat olive oil over medium heat. Pour in finely grated popchips and cook until fragrant, about 10 seconds. (This will help flavor the oil and onions). Add onions, and cook until they begin to soften and caramelize, about 7 minutes. 
3.) Add barbecue sauce and maple syrup to onions; stir, being sure to scrape the bottom of the pan. Cook for an additional 2-3 minutes.
4.) Spray a sandwich press (or frying pan) over medium heat with oil. Place a piece of muenster cheese on each slice of bread. Pour onion mixture over two slices of the bread; top each with three bread & butter pickles and several (about 4-5) barbeque popchips. Place the other slice of bread on top and push down lightly with your hand.
5.) Place both sandwiches on the sandwich press or pan and cook until golden brown, about 4-5 minutes. Flip, squishing sandwich down lightly with a spatula, and cook until the opposite side is golden brown. 


Caramelized Onion BBQ Grilled Cheese | The Economical Eater

Melty, gooey, and delicious. Napkins required.

Caramelized Onion BBQ Grilled Cheese | The Economical Eater

The crunch of the popchips mixed with the sweetness of the onions, barbecue sauce, pickles, and maple syrup was an incredible combination. The cheese on both slices of bread also helped to "glue" everything together - so, although this is a messier sandwich, it all stayed together after each ravenous bite.

What's your favorite flavor of popchips?


Tuesday, March 11, 2014

Fajitas & 'Ritas

I'm borderline obsessed with Mexican food. We make a lot of it at home, considering we always have some kind of beans and tortillas in our kitchen - and we love spice - but it's always a treat when we go out for a Mexican meal.

Z had been to Fajitas & 'Ritas several times before (when he worked in the area), but I had never been. So when the kind folks there invited us in to give it a try, I happily obliged.

The decor at Fajitas & 'Ritas quickly won me over. The walls were colorful and beautifully painted, and the open space was comfortably busy for a Wednesday night.

Fajitas & 'Ritas in Boston | The Economical Eater

Our meal began with some complimentary chips and salsa, as well as a side of fresh guacamole ($3.27).

Guacamole from Fajitas & 'Ritas | The Economical Eater

The chips were delightfully salty, although the salsa was a bit too heavy on the tomatoes for my liking. The guacamole, on the other hand, was incredibly smooth and well-seasoned - we devoured it.

Z discovered Tanteo Jalapeno Tequila on the menu, so we both got spicy margaritas ($8.18) to accompany our meal. 

Tanteo Tequila margarita from Fajitas & 'Ritas | The Economical Eater

As if the margaritas weren't spicy (or strong!) enough, we decided to start with the Fried Pickled Jalapenos ($7.01). Served with a cool and creamy chipotle blue cheese dressing, these bread and butter jalapeno pickles were lightly fried and borderline addictive...especially when dipped in the accompanying dressing.

Fried Pickled Jalapenos from Fajitas & 'Ritas | The Economical Eater

Fajitas & 'Ritas' menu is very casual, with incredibly affordable prices to boot. The menu features a number of vegetarian entrees, like the Vegetable, Bean, and Cheese Burrito ($7.71) that Z ordered and the Vegetable Fajitas ($8.41) that I had.

Vegetarian Burrito from Fajitas & 'Ritas | The Economical Eater

Vegetable Fajitas from Fajitas & 'Ritas | The Economical Eater

Z was a fan of his burrito, and I was impressed with the amount of vegetables and toppings that came with my fajitas (especially given the price!). In addition to the mound of vegetables, my fajitas also came with three flour tortillas, pico de gallo, sour cream, and guacamole.

Fajitas & 'Ritas in Boston | The Economical Eater

Fajitas & 'Ritas is definitely a more casual spot, so the food was nothing incredibly special, but everything was cooked well and seasoned nicely. It's also amazing how much food you get for such affordable prices (I even brought some leftovers home). The bartender also makes a strong drink, which is always a big plus in my book!

I should also mention that our waitress told us she has been working at Fajitas & 'Ritas for 20 years. As many of us know, many restaurants have a really high turnover - especially when it comes to the waitstaff - so when you hear of a waitress working at one restaurant for so long, you know they have to be doing something right there. I think that always speaks volumes as to how the restaurant itself is managed and run. 

All in all, we had a great meal at Fajitas & 'Ritas, and I definitely plan to go back. Nothing sounds better right now than a plate of nachos and a Tanteo margarita!

Have you ever been to Fajitas & 'Ritas before? If yes, what's your review?

Fajitas & 'Ritas on Urbanspoon

We received 50 percent off our bill for this meal. As always, all opinions are my own.