Showing posts with label simple recipes. Show all posts

Thursday, June 12, 2014

Chickpea, Mint, and Feta Burgers with Yogurt-Dill Sauce

Just checking in with a quick, tasty new burger recipe before Z and I jet off to Portland, Oregon for a few days!

The burgers and the yogurt-dill sauce in this recipe both use herbs we're growing right in our backyard. (Well, I accidentally planted "dill bouquet," but it still works). In addition to the dill, the burgers possess fresh, fragrant mint that helps complement the aromatic spices and the creamy feta. These burgers were quite a hit with Z, and I know they'll be a hit with your family, too!

Chickpea, Mint, and Feta Burgers with Yogurt-Dill Sauce | The Economical Eater

Chickpea, Mint, and Feta Burgers with Yogurt-Dill Sauce
Yields: 4 burgers
Burgers:
-1 15-ounce can chickpeas, drained and rinsed
-1/2 small yellow onion, minced
-1/4 cup loosely packed fresh mint leaves
-1 clove garlic, minced
-1 teaspoon ground cumin
-1/2 teaspoon paprika
-Salt and black pepper, to taste
-1/8 cup yellow corn meal (or plain bread crumbs)
-3 tablespoons olive oil, divided
-1/4 cup crumbled feta
-4 burger buns
-Sliced cucumber (optional)

Yogurt-Dill Sauce:
-1 5.3-ounce container plain Greek yogurt (I used Chobani)
-1 tablespoon chopped fresh dill
-Squirt of lemon juice
-Salt and black pepper, to taste

Directions:
Burgers:
1.) Place the chickpeas, onion, mint, and garlic in a food processor that's fitted with a steel blade. Pulse until combined and texture is mostly smooth, but still slightly chunky. (If you don't have a food processor, just mash the chickpeas with a fork and just be sure the mint is chopped).
2.) Spoon the chickpea mixture into a medium bowl and add spices, corn meal, and 1 tablespoon olive oil. Stir until combined, then taste for seasoning and adjust as necessary. Add feta and carefully stir to combine.
3.) Heat remaining 2 tablespoons olive oil over medium heat. As oil is warming up, form the chickpea mixture into four equal-sized patties. Place patties in the pan and cook for about 5 minutes, or until golden brown. Carefully flip burgers and cook on the opposite side until golden brown, about 3-4 minutes. 
4.) Serve with generous slathers of yogurt-dill sauce and sliced cucumber.

Yogurt-Dill Sauce:
1.) In a small bowl, combine ingredients. Let chill in fridge for 30 minutes before serving.


I loved how the cooling mint and the creamy yogurt-dill sauce complemented the smoky cumin and paprika. These burgers really tasted like summer, and I loved how some of the ingredients came right from our own backyard!

If you have several cans of chickpeas on-hand, I also recommend trying my Chickpea Burgers with Vegan Cilantro Mayonnaise.

Have you ever been to Portland, Oregon before? Any suggestions for where we should go?


Monday, June 2, 2014

Mexican Pasta Salad

Most of the time, I make pesto (or infused simple syrups) with leftover herbs. Those are definitely my two go-to uses for everything from leftover basil to rosemary to parsley. But last week, when I was faced with a bunch of leftover cilantro, I wanted to try something a little different. So I turned the leftovers into a refreshing dressing that got mixed into this vibrant and flavorful pasta salad.

Mexican Pasta Salad | The Economical Eater

Mexican Pasta Salad
Yields: 8 servings
For Salad:
-1 pound farfalle pasta (or pasta of your choice)
-1 pint grape tomatoes, halved
-1 cup frozen or fresh sweet corn kernels
-1/4 cup diced red onion
-1 tablespoon diced pickled jalapenos
-Salt and black pepper, to taste

For Dressing:
-1/4 cup finely chopped cilantro
-Juice of 1 1/2 limes
-1/2 teaspoon ground cumin
-1 teaspoon chili powder
-3 tablespoons olive oil
-Pinch of granulated sugar
-Salt and black pepper

Directions:
1.) Bring a large pot of salted water to a boil; add pasta and cook according to package directions. Drain and set aside.
2.) In a medium-sized bowl, rapidly whisk together the ingredients for the dressing. Dunk in a piece of the cooked pasta and taste; adjust seasoning as/if needed. Set dressing aside.
3.) In a large bowl, mix pasta with tomatoes, corn, red onion, and jalapenos. Add dressing and toss until pasta and vegetables are coated nicely (but are not overdressed). (The amount of dressing you make should be perfect for 1 pound of pasta). Taste and add salt and pepper as needed.

This pasta salad can be refrigerated for up to 24 hours before serving.


Mexican Pasta Salad | The Economical Eater

The bright, flavorful salad dressing mixed with the plump, juicy tomatoes, spicy red onion, and sweet corn was a divine combination - especially when served with veggie sausages and burgers (for the omnivores, obviously) cooked on the grill. I loved how the farfalle pasta's nooks and crannies soaked in all of the dressing, but really any pasta would do well here. 

Mexican Pasta Salad | The Economical Eater

Bonus: This pasta salad is also vegan!

What's your favorite side dish to bring to a cookout? 

Friday, April 25, 2014

Boozy Iced Mocha

We live dangerously close to Cafe Rustica in Somerville, and I always order an iced mocha when we go there. I just love the combination of coffee and chocolate together.

Yesterday, after a successful meeting in Boston, I rode the T home craving an afternoon iced coffee - specifically, an iced mocha. But since it was Thursday and it was past noon, I decided to put some booze in it. 

Boozy Iced Mocha | The Economical Eater

Boozy Iced Mocha
Yields: 1 cocktail
-1 cup iced coffee
-Splash of creme de cacao
-3 ice cubes
-Unsweetened vanilla almond milk (or any milk you prefer)

Directions:
1.) Pour iced coffee, vodka, and creme de cacao into a cocktail shaker; shake well.
2.) Place ice cubes in a rocks glass; pour coffee mixture over ice. Add almond milk and stir. 


Boozy Iced Mocha | The Economical Eater

Um, yeah...the hint of rich chocolate from the creme de cacao mixed with the roasted coffee and creamy almond milk was a divine combination. I could all too easily drink this in the morning vs. waiting for cocktail time. But hey, it's almost the weekend, and boozy drinks before noon are totally acceptable - so feel free to have one (or two) of these with brunch tomorrow morning.

Cheers!


Monday, March 24, 2014

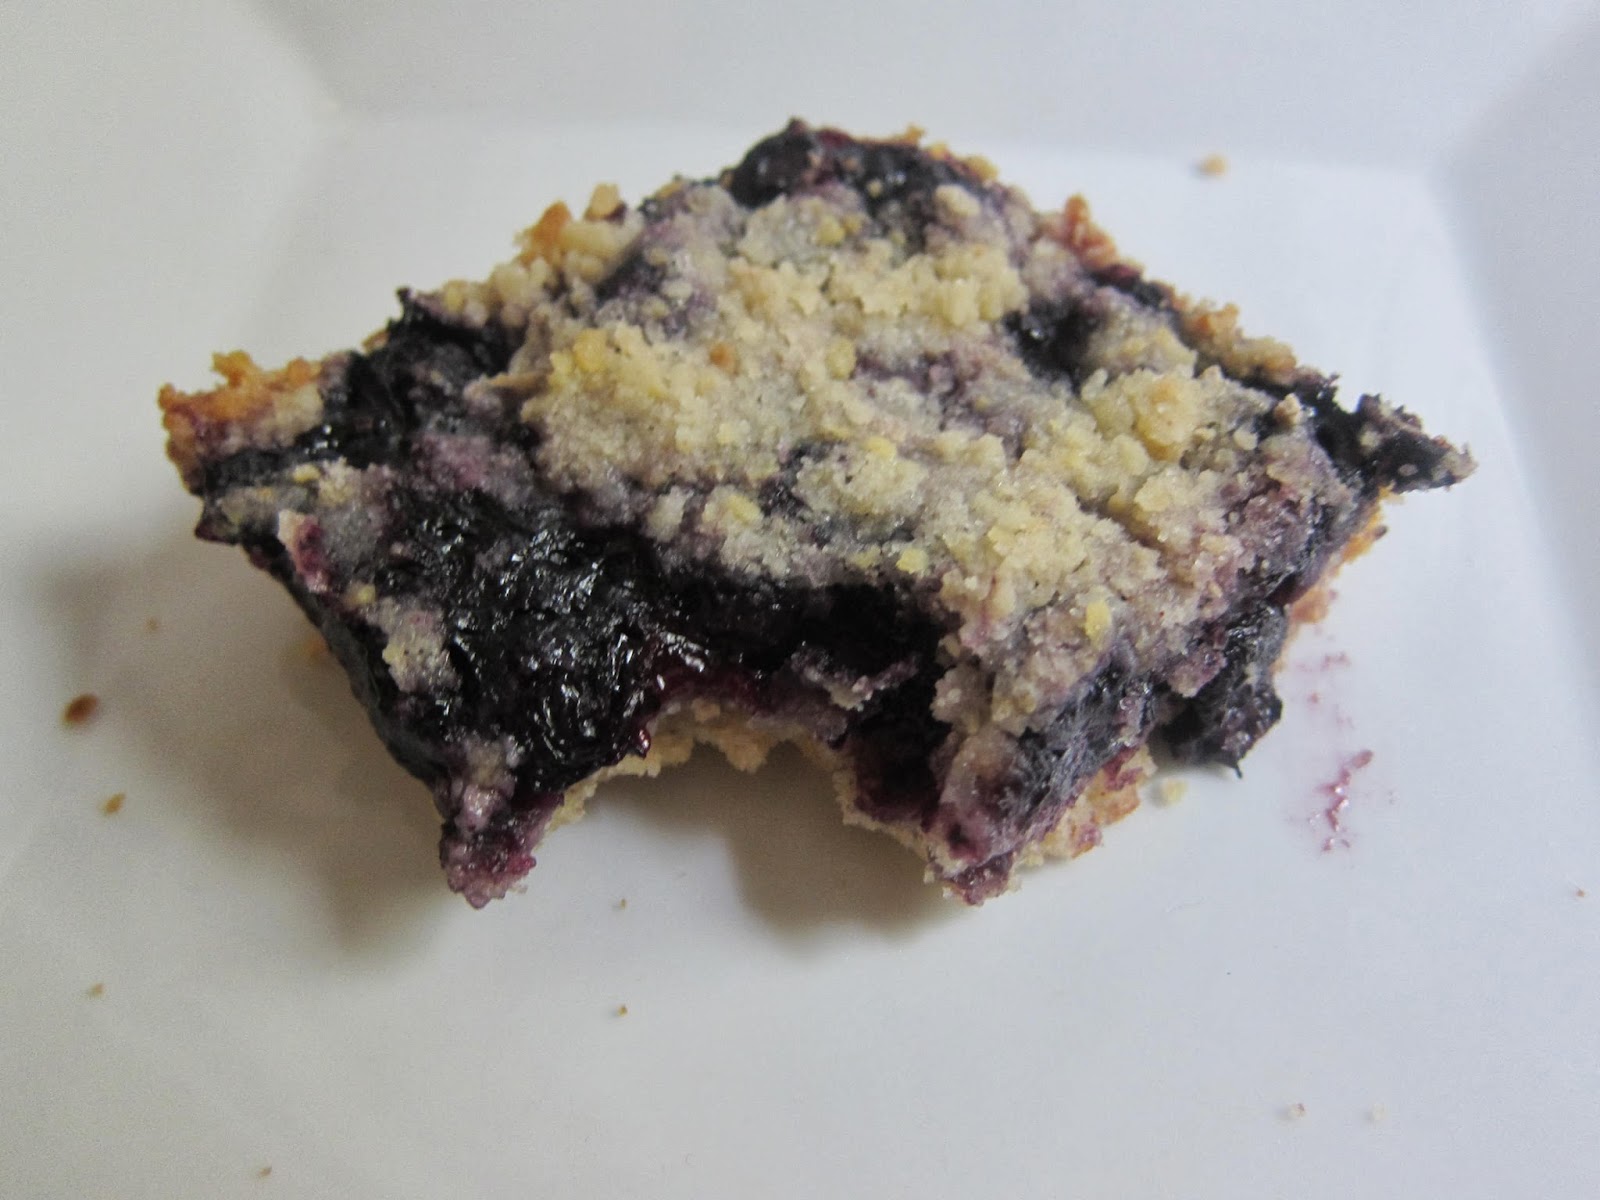
Blueberry Crumb Bars

My favorite fruit has to be blueberries. And when I can't get them fresh, I'm perfectly happy buying them frozen...and having a big ol' cup of them in my cereal almost every weekday morning.

Last week, I had an intense desire to bake (which, if you know me, is rare), and a ton of leftover frozen blueberries to use...and thus, these bars were born.

The garam masala isn't 100% necessary, but it does make an incredibly delicious difference in these bars. This dessert (or snack!) is not overly sweet, but is bursting with juicy blueberries complemented by the flavorful garam masala and the tangy lemon juice. 

Blueberry Crumb Bars | The Economical Eater


Blueberry Crumb Bars
Yields: 9 bars
Adapted from Damn Delicious
-3/4 cup granulated sugar, divided, plus extra for sprinkling
-2 teaspoons cornstarch
-1 tablespoon lemon juice
-2 cups frozen (or fresh) blueberries
-1 1/2 cups all-purpose flour
-1/2 teaspoon baking powder
-1/4 teaspoon garam masala
-1/4 teaspoon salt
-1 large egg yolk
-1 teaspoon vanilla extract
-1 stick unsalted cold butter, cut into cubes

Directions:
1.) Preheat oven to 375 degrees. Lightly coat an 8×8 baking dish with nonstick spray.
2.) In a small bowl, combine 1/4 cup sugar and cornstarch. Stir in lemon juice. Add blueberries and gently toss to combine; set aside.
3.) In a large bowl, combine flour, remaining 1/2 cup sugar, baking powder, garam masala, and salt. Add egg yolk, vanilla, and cold butter, using your fingers to work the butter into the dry ingredients until it resembles coarse crumbs.
4.) Spread 2/3 of the batter into the prepared baking dish. Spread blueberry mixture evenly over the bottom layer. Sprinkle with remaining 1/3 of the batter and a generous sprinkling of sugar (about 1 tablespoon).
5.) Place into oven and bake until lightly browned, about 35-40 minutes. Let cool slightly before cutting into bars.

[Print this recipe]

Blueberry Crumb Bars | The Economical Eater

Yup. So many delicious blueberries.

Blueberry Crumb Bars | The Economical Eater

Z and I aren't huge dessert people, but we loved that these bars provided a sweet treat without totally overpowering us with sugar. Given how tame they are, one of these bars would be great with a cup of coffee in the morning, or for a "palate cleanser" after dinner. (See what I did there?).

What's your favorite fruit?


Thursday, March 13, 2014

Caramelized Onion BBQ Grilled Cheese

Last week, I attended an event put on by Blog and Tweet Boston - in conjunction with popchips and Kitchensurfing - at Workbar in Cambridge.

Workbar Cambridge | The Economical Eater

The event featured three Kitchensurfing chefs, who were competing to see who made the best dish that evening. The catch? Their dishes had to incorporate popchips in an innovative - and delicious - way.

Kitchensurfing chefs | The Economical Eater

The chefs above prepared a banh mi sandwich - appropriately named "A Vietnamese Banh Mi Sandwich & Popchips Had a Baby" - made with delicious pickled vegetables (they made me a vegetarian version)...and a bun made out of popchips. (They also incorporated popchips in several other ways, but the bun impressed me the most). Due to the taste and overall creativity, this was my favorite dish of the evening.

Banh Mi made with Popchips | The Economical Eater

Following the event, Blog and Tweet Boston challenged us bloggers to incorporate popchips in our own innovative recipes. Growing up, I loved putting chips in my sandwiches - that added crunch and salt just made every bite of a plain old sandwich that much more special. I haven't even thought to add chips to my sandwich as an adult...until I was faced with this popchips challenge.

But I didn't want to make just any old sandwich. I wanted to incorporate popchips' barbeque potato chips into a gloriously cheesy, melty, decadent grilled cheese sandwich. To start, I ground one bag of the chips in my spice grinder to help flavor and caramelize some onions. (You can also grind them by simply crushing them in the bag, if you don't have a spice grinder).

Barbeque Potato Popchips | The Economical Eater

The sandwich is then finished off with barbecue sauce, a dash of maple syrup, sweet pickles, and lots of cheese.

Caramelized Onion BBQ Grilled Cheese | The Economical Eater

Caramelized Onion BBQ Grilled Cheese
Yields: 2 sandwiches
-2 individual bags of Barbeque Potato popchips
-2 tablespoons olive oil
-1/2 yellow onion, sliced
-1 tablespoon barbecue sauce
-Dash of maple syrup
-4 slices sourdough bread
-4 slices muenster cheese
-6 bread & butter pickle slices

Directions:
1.) Pour one bag of popchips into a spice grinder and grind until finely grated. (Or, simply crush in the bag with your hands).
2.) In a medium saute pan, heat olive oil over medium heat. Pour in finely grated popchips and cook until fragrant, about 10 seconds. (This will help flavor the oil and onions). Add onions, and cook until they begin to soften and caramelize, about 7 minutes. 
3.) Add barbecue sauce and maple syrup to onions; stir, being sure to scrape the bottom of the pan. Cook for an additional 2-3 minutes.
4.) Spray a sandwich press (or frying pan) over medium heat with oil. Place a piece of muenster cheese on each slice of bread. Pour onion mixture over two slices of the bread; top each with three bread & butter pickles and several (about 4-5) barbeque popchips. Place the other slice of bread on top and push down lightly with your hand.
5.) Place both sandwiches on the sandwich press or pan and cook until golden brown, about 4-5 minutes. Flip, squishing sandwich down lightly with a spatula, and cook until the opposite side is golden brown. 


Caramelized Onion BBQ Grilled Cheese | The Economical Eater

Melty, gooey, and delicious. Napkins required.

Caramelized Onion BBQ Grilled Cheese | The Economical Eater

The crunch of the popchips mixed with the sweetness of the onions, barbecue sauce, pickles, and maple syrup was an incredible combination. The cheese on both slices of bread also helped to "glue" everything together - so, although this is a messier sandwich, it all stayed together after each ravenous bite.

What's your favorite flavor of popchips?


Wednesday, March 5, 2014

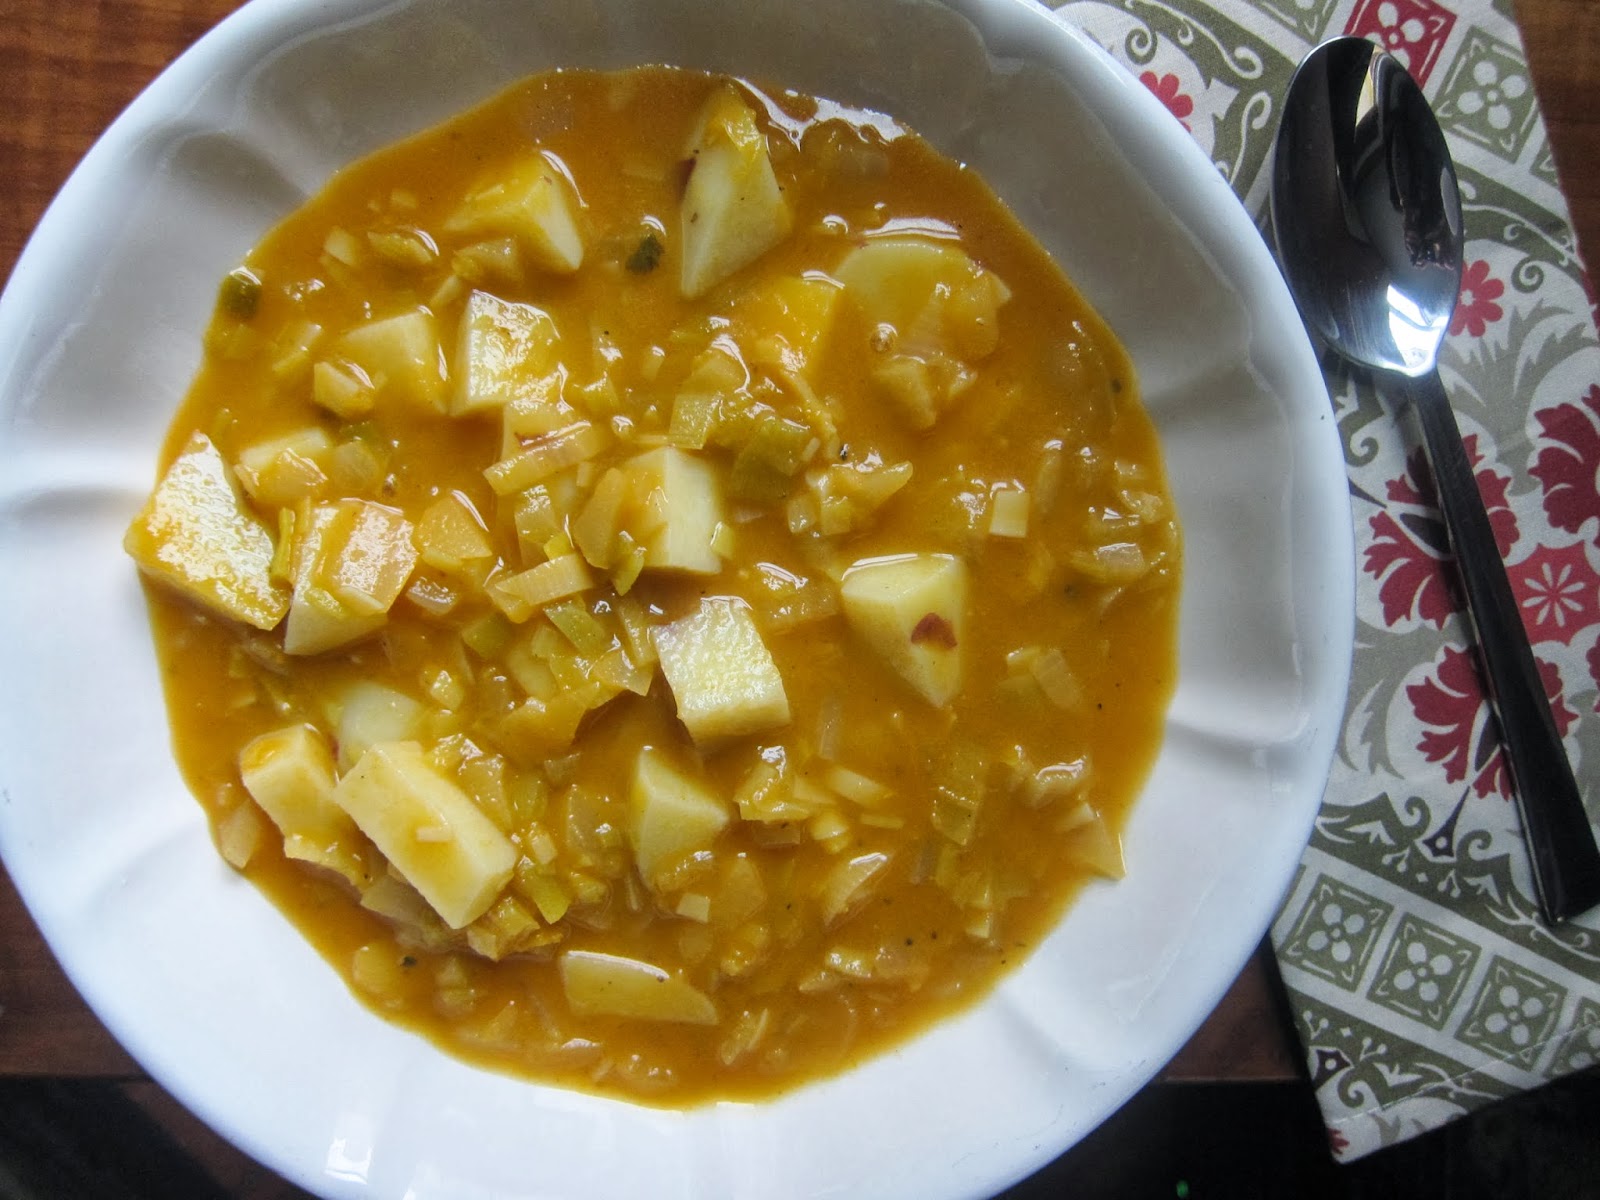
Hearty Potato-Leek Soup

This Irish girl loves potatoes. But, sadly, my half-Irish husband does not. So I've made it my life goal to get him to love potatoes as much as I do. 

This soup was a good start (as was this sweet potato soup). Made with hearty red potatoes, the base of this soup is simple: leeks, onions, and garlic. It's only seasoned with a bay leaf, salt, and pepper. And it's amazing how much flavor was packed in each spoonful. Simple really is the best, when executed correctly.

This recipe was inspired by a similar recipe in Cook's Illustrated Cookbook, but I used what I had on-hand and tweaked as necessary. Feel free to make this soup with all leeks vs. leeks + onions, but I actually enjoyed the textures and flavors the two added to this recipe. 

Hearty Potato-Leek Soup | The Economical Eater

Hearty Potato-Leek Soup
Yields: 4 servings
-2 tablespoons unsalted butter + 2 tablespoons olive oil (or, use all olive oil to make this recipe vegan)
-2 cups chopped leeks, white and light green parts only (save the darker parts for stock!)
-1 medium yellow onion, diced
-1/2 tablespoon all-purpose flour
-1 clove garlic, minced
-3 cups low sodium vegetable broth (+ more as needed)*
-1 lb. red potatoes, peeled and cut into 3/4-inch chunks
-1 bay leaf
-Salt and black pepper, to taste

Directions:
1.) Heat butter and olive oil in a large saucepan over medium heat. Add leeks and onions and cook until tender, about 7-8 minutes. Add garlic and cook until fragrant, about 30 seconds. Sprinkle flour over leeks and onions, stir to coat, and cook until flour dissolves, about 2 minutes.
2.) Increase heat to high and, stirring constantly, gradually add broth. Add potatoes and bay leaf, cover, and bring to a boil. Reduce heat to simmer, covered, until potatoes are almost tender, 5 to 7 minutes.
3.) Remove pot from heat and let stand until potatoes are completely tender, about 10 to 15 minutes. Discard bay leaf and season with salt and pepper as needed.

*Depending on how thick you like your soup, feel free to add more broth.


Hearty Potato-Leek Soup | The Economical Eater

Hearty, flavorful, and warm - three things I need to help me get through the rest of this bitter cold winter. Thank god we have leftovers of this in the freezer - it will come in handy over these next few weeks!

Are you a fan of potatoes? I love them mashed, roasted, baked...you name it, I will eat it.


Friday, February 21, 2014

Crockpot Spinach and Chickpea Coconut Curry

I love throwing a bunch of ingredients in the crockpot and eventually calling it dinner. 

Crockpot Spinach and Chickpea Coconut Curry | The Economical Eater

That's how this recipe was born. The snow/rain was falling outside, and I wanted our house to be filled with warm, comforting, delicious smells. And it doesn't get much more warm, comforting, or delicious than Indian food, in my opinion. 

Crockpot Spinach and Chickpea Coconut Curry
Yields: 2 servings
-1 can chickpeas, drained and rinsed
-1 large garlic clove, minced
-1/2 yellow onion, sliced
-8 pickled jalapeno slices, minced (or 1 small jalapeno, seeded and minced)
-1 teaspoon curry powder
-1/2 teaspoon garam masala
-1/4 teaspoon turmeric
-1/4 teaspoon grated fresh ginger
-1 teaspoon dried parsley
-1 bay leaf
-Pinch of cayenne
-Salt and black pepper
-1/2 cup coconut milk
-2 handfuls baby spinach 

Directions:
1.) Place all ingredients up to coconut milk in a crockpot and stir. Cook on high for two hours, then cook for an additional three hours on low.
2.) About ten minutes before serving, stir in coconut milk and spinach. Serve with warm naan.


Crockpot Spinach and Chickpea Coconut Curry | The Economical Eater

The warm spices mixed with the creamy coconut milk was a divine combination, while the chickpeas, spinach, and onions provided great texture in every bite. Scooped up with some warm naan, this was the perfect winter meal - that was nutritious, super affordable, and easy to make! (If you want an even more satiating meal, I recommend serving it over basmati rice).

Two things worth mentioning: If you want leftovers, feel free to double this recipe. Also, if you're hesitant to buy fresh ginger versus just using powdered, the fresh really makes a difference in this dish. I actually keep fresh ginger in the freezer and use it as I need to. We use it all the time in Indian dishes, but also in fresh juice!

Do you have a go-to crockpot recipe?


Wednesday, February 12, 2014

Z's 3x Yellow Tofu Marinade

OK, so this recipe may have a weird title...but it's the best Z and I could come up with for his famous (well, in our house at least) tofu marinade recipe. You see, Z has been making this concoction for years, but it wasn't until last week I decided to write it down - and share it with all of you.

The inspiration to write it down came from my friends at Nasoya, who sent me a few coupons to try out their new TofuPlus products. TofuPlus is the first (and only) line of tofu “beefed up” with the nutrients commonly lacking in vegetarian and vegan diets. The best part? All of Nasoya's tofu products are organic, non-GMO, gluten-free, and dairy-free.

I'm a big fan of extra firm tofu when it comes to cooking, so I tried the Organic Extra Firm TofuPlus for this recipe. I really didn't find any difference in taste or texture between this tofu and "regular" tofu, but it was nice to know we were getting some extra nutrients in each bite - without compromising flavor.

So, what the heck makes Z's tofu marinade recipe three times yellow? Dijon, curry powder, and ground ginger. (OK, ginger is not really yellow, but you get the point!).

Z's 3x Yellow Tofu Marinade | The Economical Eater #vegan

Z's 3x Yellow Tofu Marinade
Yields: 3-4 servings
-1 package Nasoya Organic Extra Firm TofuPlus, drained and cut into cubes
-1/2 teaspoon ground ginger
-1 teaspoon curry powder
-Pinch of cayenne 
-1 1/2 tablespoons Dijon mustard
-1 tablespoon olive oil (or canola or vegetable oil)
-Salt and black pepper, to taste

Directions:
1.) In a medium-size bowl, carefully mix ingredients together. Taste for seasoning and adjust as necessary.
2.) Cover bowl with plastic wrap and place in fridge. Let marinate for at least 1 hour (the longer the better).


We cooked our marinated tofu in a wok with sliced onion, garlic, pickled jalapenos, and a few sun-dried tomatoes (our current obsession) - but feel free to stir-fry this tofu with whatever vegetables you wish!

Z's 3x Yellow Tofu Marinade | The Economical Eater

The end result is a spicy, tangy, oh-so-flavorful tofu dish. The first time Z made this for me, years ago, I was skeptical of the Dijon - but trust me when I say, it works. Mixed with the other spices and ingredients, the Dijon gives the otherwise bland tofu a welcome punch of flavor.

Do you have a "famous" recipe in your house? If so, what is it?

Nasoya provided me with coupons to try their new TofuPlus products for free. As always, all opinions are my own.


Wednesday, February 5, 2014

Horseradish Deviled Eggs

We made these deviled eggs for the Super Bowl, and, as you can imagine, they were a way bigger hit than the game itself. But even if the game was somewhat exciting, these deviled eggs would have still been successful.

The recipe is similar to that of my Spicy Deviled Eggs, but I took the recipe up a notch with some prepared horseradish. The end result was the traditional, creamy deviled eggs many people know and love with a kick of tolerable spice in each mouthful.

Horseradish Deviled Eggs | The Economical Eater

Horseradish Deviled Eggs
Yields: 15 servings*
-15 large eggs
-2 tablespoons minced pickled jalapenos
-2 teaspoons prepared horseradish
-6 tablespoons Trader Joe's Wasabi Mayonnaise (or plain mayonnaise)
-4 tablespoons Dijon mustard
-Salt and black pepper, to taste
-Squirt of fresh lemon juice
-Paprika and chopped chives, for garnish

Directions:
1.) Put the eggs in a large saucepan and cover them with water. Bring the water to a boil over medium heat, then cover, and remove the saucepan from the heat. Allow the eggs to sit for 10 minutes. 
2.) Remove eggs from pan and shock in ice water. Peel the eggs and cut in half. Remove the yolks to a medium-sized bowl, and mash with the back of a fork.
3.) Add the jalapenos, horseradish, mayonnaise, mustard, salt, pepper, and lemon juice to the bowl. Mix until smooth and creamy. 
4.) Spoon the mixture into a piping bag. Arrange the egg whites on a serving platter. Pipe a heaping tablespoon of the egg yolk mixture into each of the egg whites. Lightly sprinkle each egg with paprika and chopped chives.

*15 servings seems a bit random, but I used 15 eggs based on how many people we had coming over. If you wanted to just make 12 eggs/servings, I'd recommend starting with 1 tablespoon jalapenos, 1 teaspoon horseradish, 4 tablespoons mayonnaise, 2 tablespoons mustard, and tasting/adjusting from there.


Horseradish Deviled Eggs | The Economical Eater

I'm seriously craving another one of these deviled eggs right now. I loved the kick of spice the wasabi, jalapenos, and horseradish added to each bite, while the cool, creamy texture of the filling helped to calm everything down a bit. Z's cousin is actually anti-spice, but he still loved these deviled eggs - they were just spicy enough, without ruining his palate for the entire evening. 


Tuesday, January 28, 2014

Vegetarian-Friendly Super Bowl Recipes

Despite the Pats not making it to this year's Super Bowl, we still plan to watch the game/commercials. And eat our faces off.

Whether you're hosting the Super Bowl festivities this year, or simply looking to bring a simple (yet tasty) dish to a friend's house, these vegetarian- and vegan-friendly recipes should do the trick. They're indulgent and football-friendly, while also being [mostly] friendly to your waistline (and wallet!).

Vegetarian-Friendly Super Bowl Recipes | The Economical Eater

Appetizers/Lighter Fare:
Spicy Deviled Eggs
Jalapeno Poppers with Chive Cream Cheese
Baked Fontina
Black Bean Sliders
Hippie Joes
Veggie Sausage Subs
Slow Cooker Vegetarian Chili
No-Yeast Pizza Dough (with Homemade Pizza Sauce)

Desserts:
Nutella and Banana Turnovers with Sea Salt
Boozy Irish Whoopie Pies
Guinness Dark Chocolate Brownies

Cocktails:
Gin and Ginger Cocktail
Cucumber-Dill Gin Fizz
Jalapeno Dirty Martini

Will you be watching the Super Bowl this year?


Thursday, January 16, 2014

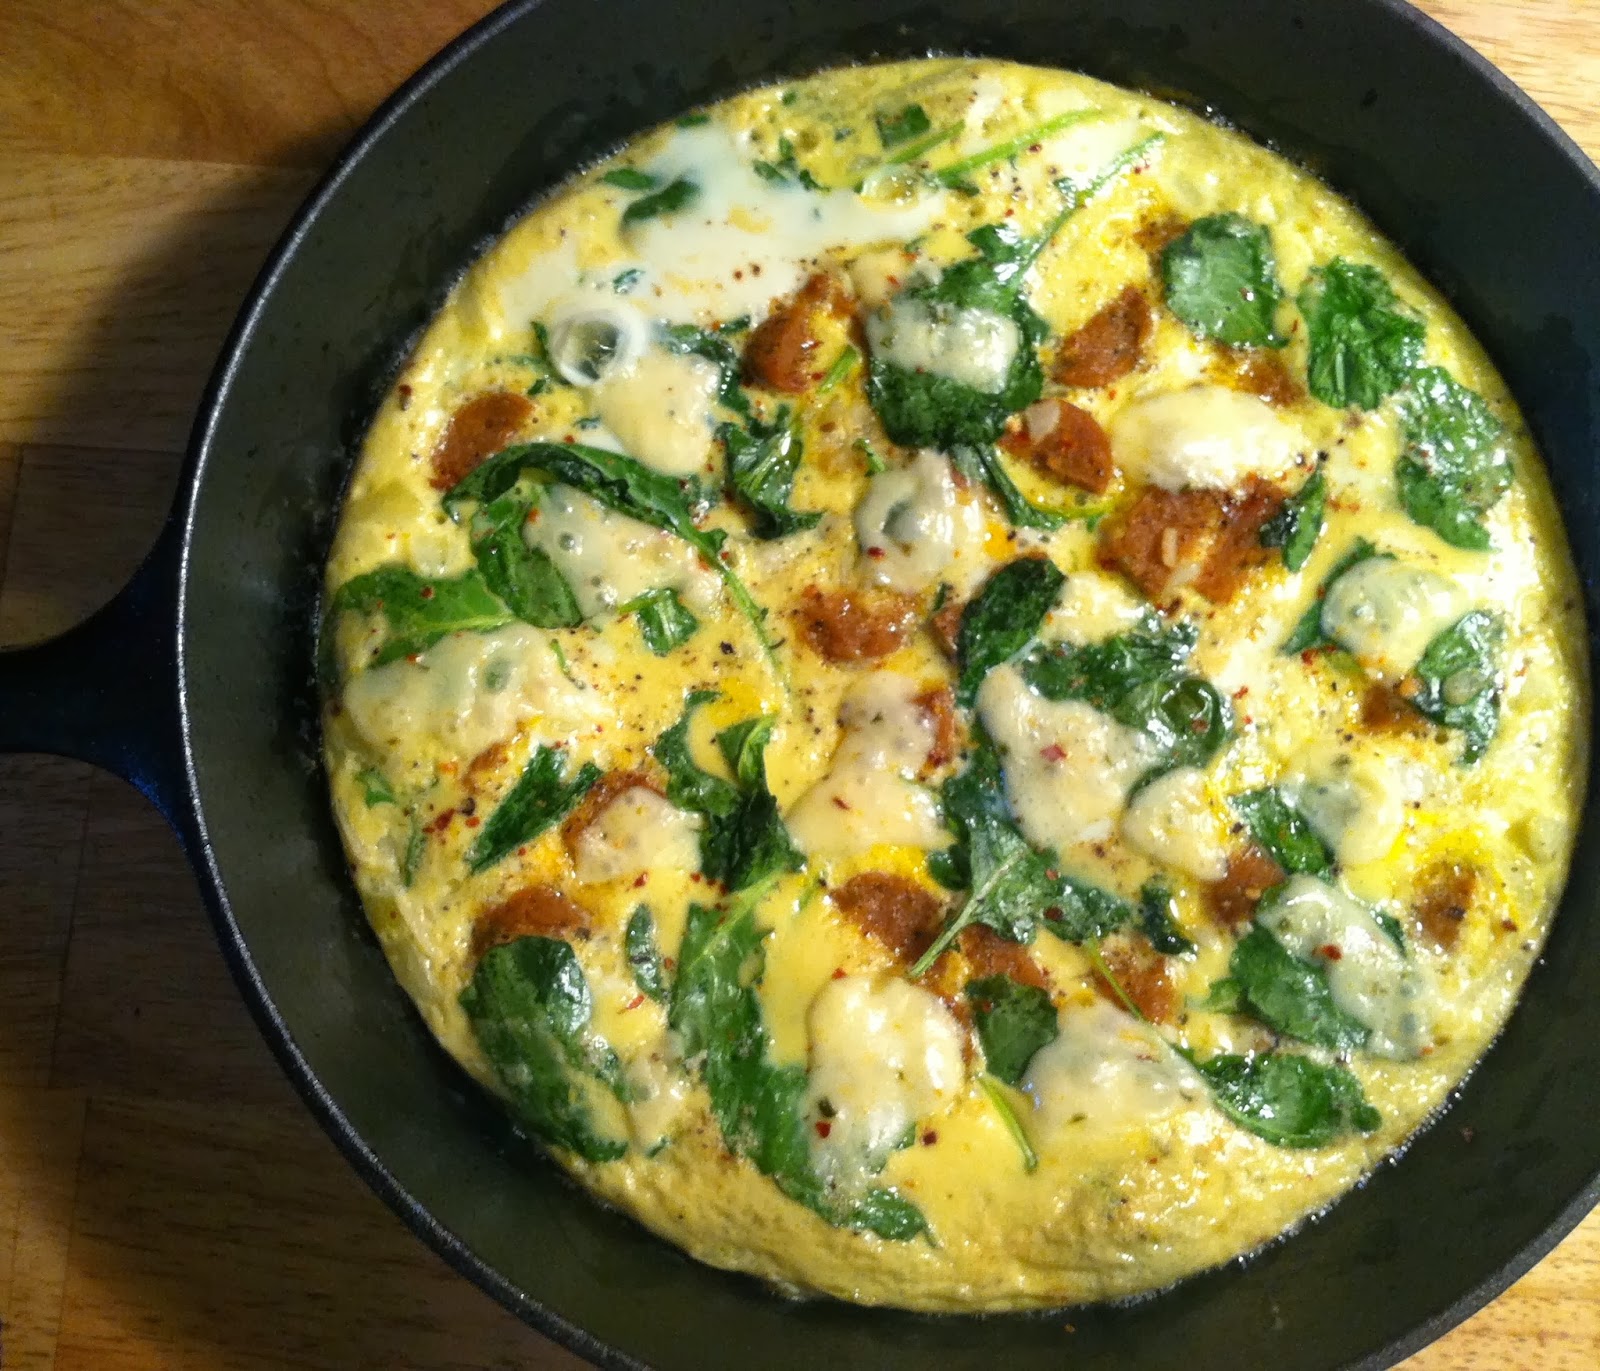
Kale, Onion, and Sausage Frittata

For Christmas, my parents gave me and Z a cast-iron pan. To say I was excited would be an understatement - I've been wanting one for quite some time now.

When we opened this gift, I knew the first thing I wanted to make in it: a frittata. And that's exactly what I did last weekend.

For this frittata, I used a combination of eggs and egg whites - Z is trying to cut back on his cholesterol intake, so we always have egg whites in the fridge. However, feel free to use just eggs for this recipe.

Frittatas are also a great way to use up leftover veggies and meats/veg-friendly "meats," so feel free to change this recipe up as you see fit. 

Kale, Onion, and Sausage Frittata | The Economical Eater

Kale, Onion, and Sausage Frittata
Yields: 3-4 servings
Adapted from Food Network
-8 large eggs (I used a combination of eggs and egg whites - about 50/50)
-2 tablespoons whole milk 
-Salt and pepper
-1 tablespoon butter
-1/2 yellow onion, diced
-1 to 1 1/2 cups baby kale 
-1 vegetarian Italian sausage, chopped
-Pinch of crushed red pepper flakes
-Pepper jack cheese (optional)

Directions:
1.) Preheat oven to 400 degrees F.
2.) In a large bowl, whisk together eggs, milk, salt, and pepper.
3.) Melt butter in a cast-iron pan over medium heat. Add the onion and cook until it begins it brown, about 5-7 minutes. Add kale, sausage, and crushed red pepper flakes and cook for an additional minute. Pour the eggs over the mixture.
4.) Pull the edges away from the sides of the pan with a spatula so the eggs flow to the bottom of the pan. When the frittata is half set, transfer the pan to the heated oven. 
5.) Bake for 7 minutes. Remove from oven, sprinkle with cheese, and put the pan back in the oven for an additional 3-4 minutes, until cheese is melted and frittata is puffed and golden.


Paired with some toast and hot sauce, this was one incredible (and filling!) brunch.

What else should I make in my cast-iron pan?


Monday, January 6, 2014

Maple-Roasted Brussels Sprouts

Growing up, my Irish/Scottish/English family ate a lot of boiled cabbage, especially with pot roast and potatoes at Sunday dinners. But it wasn't until I was in my twenties that I discovered the better, "baby cabbage," as well as the art of roasting vegetables. Now, roasted Brussels sprouts are my winter vegetable addiction. I can't get enough of them!

Maple-Roasted Brussels Sprouts | The Economical Eater

I recently also discovered the beauty of pairing sweet maple syrup with salty Brussels sprouts. Throw in some dried cranberries and roasted sunflower seeds, and you have yourself one heck of a winter side dish. 

Head on over to Local in Season for the full recipe!

Are you a fan of Brussels sprouts?


Tuesday, November 5, 2013

Spicy Chickpea and Vegetable Soup

Once the weather gets chilly, all I crave are comforting bowls of soup. I have a few favorites that I make on a regular basis, but I also love coming up with new recipes that will hopefully become a new fall and winter favorite. And while I love smelling a pot of stew cooking on a cozy weekend day, I also enjoy making quicker, just-as-comforting soups during the week. So when the folks at Pacific Foods asked if I wanted to try their Soup Starters, I was instantly intrigued.

Pacific Foods sent me their Tortilla Soup Base and Vegetarian Pho Soup Base (both organic and non-GMO), and both made weeknight soups easy to throw together, while still being packed with flavor. This soup, in particular, was ready in 30 minutes. Seriously.

Just a quick tip: I added the spices to the oil so they would really open up and infuse the soup with flavor. It definitely makes a noticeable difference!

Spicy Chickpea & Vegetable Soup | The Economical Eater

Spicy Chickpea & Vegetable Soup
Yields: 3-4 servings
-2 tablespoons olive oil
-Chili powder
-Ground cumin
-Pinch of cinnamon
-1 yellow onion, diced
-8 ounce package white button mushrooms, sliced
-1 large clove garlic, minced
-1/2 teaspoon dried oregano
-Salt and black pepper
-1 cup frozen corn
-1 15 ounce can chickpeas, drained and rinsed
-1 jalapeno pepper, seeded and minced
-2 cups Pacific Tortilla Soup Starter
Recommended garnishes: cilantro, shredded cheese, and hot sauce

Directions:
1.) Heat olive oil in a medium saucepan over medium heat. Once warm, add chili powder, cumin, and cinnamon; cook until fragrant, about 10 seconds. Add onion, and cook until mostly softened, about 6-7 minutes.
2.) Add mushrooms and cook for 4-5 minutes, or until they begin to brown. Add garlic, oregano, salt, pepper, and corn; cook for about 2-3 minutes more.
3.) Add chickpeas and jalapeno; stir, and taste for seasoning (adjust as necessary). Add Soup Starter, and turn heat up to high. Bring to a boil, then lower heat and simmer for 15-30 minutes, or until you're ready to serve.

[Print this recipe]

I love chunky, satisfying soups and stews, and this was one soup full of great texture and "meatiness." The spices were also a great complement to the chickpeas and vegetables. I also loved how the Soup Starter was flavorful but not weighed down with sodium - I could easily control the salt content.

What's your favorite soup to make in the fall/winter?

The Pacific Foods Soup Starters I received were complimentary, but all opinions are my own.


Thursday, October 31, 2013

Eggplant and Sun-Dried Tomato Pizza

I have an obsession with making the best homemade pizza right now (thankfully, I've already mastered the sauce...and some no-yeast dough). As a result, it's hard for me to buy store-bought sauces or crusts anymore - they all just taste like the packages they're sold in. But when local company Rustic Crust (based out of Pittsfield, N.H.) reached out to me to help them celebrate National Pizza Month with their "My-Oh-Pie" Pizza Recipe Competition, I was intrigued.

The main reason I was interested in working with Rustic Crust was the ingredients they use. For instance, the ingredient list on their Crispy Thin Crust (which was used for this recipe) goes a little something like this: Unbleached/Unbromated Wheat Flour, Water, Natural Culture, Semolina Flour, Whole Wheat Flour, Sea Salt, Honey, Yeast, Organic Soy Oil, Olive Oil.

Obviously, there are more ingredients in here than I'd use for my own dough, but I still love how everything is legible and real. No scary chemicals or words I can't pronounce.

For the My-Oh-Pie contest, I was asked to create a pizza recipe with Rustic Crust's sauce and one of their crusts. The recipe I developed is loaded with fresh flavors, varying textures, and a wonderful hit of fresh garlic in each bite.

Eggplant and Sun-Dried Tomato Pizza | The Economical Eater

Eggplant and Sun-Dried Tomato Pizza
Yields: 1 pizza (about 2-4 servings)
-1 small eggplant, cut into 1/3-inch-thick rounds
-2 tablespoons good olive oil
-1 clove garlic, minced
-Pinch of crushed red pepper flakes
-Shredded mozzarella cheese 
-2 tablespoons of jarred sun-dried tomatoes
-1/4 teaspoon dried basil

Directions:
1.) Turn your broiler on. Arrange eggplant rounds on a foil-lined baking sheet. 
2.) In a small bowl, mix oil, garlic, and crushed red pepper together; brush oil mixture on both sides of eggplant. Broil for 3-4 minutes on each side, until golden brown and tender.
3.) When eggplant is done, turn oven down to 425. Spread sauce on crust and top with cheese. Then, layer on the eggplant slices, overlapping slightly. Dot sun-dried tomatoes all over pizza; sprinkle over dried basil. 
4.) Cook pizza in oven for 8 to 12 minutes, or until cheese is bubbling and crust is golden brown.


Eggplant and Sun-Dried Tomato Pizza | The Economical Eater

I definitely had two slices of this for lunch...and two after the Red Sox game last night (that was after going out to dinner). This pizza is that good, and I was really impressed with how crispy and tasty the crust was - no cardboard flavor at all. The sauce was also nicely sweet with a great tomato flavor.

If I become one of five finalists in the My-Oh-Pie contest, I'll let you guys know!

What are your favorite pizza toppings?

P.S. Yay Red Sox!

Rustic Crust sent me their products in order for me to create a recipe. As always, all opinions are my own.


Tuesday, October 15, 2013

Chickpea Fritters

Hello! I hope everyone had a great [long?] weekend. Mine was pretty jam-packed, but awesome. (Let's just say it included lots of desserts (more on that later), a Duck Tour with my nephew, and Cornhole with Z). 

I didn't make this recipe over the weekend, but I did make it a few weeks ago when Z's parents gave us a tub of yogurt-dill sauce they had leftover from a party. I wanted to use it up in something more special for dinner, and since we had a can of chickpeas in the cabinet (per usual), these Chickpea Fritters came to be. 

Chickpea Fritters | The Economical Eater

Chickpea Fritters
Yields: 2 servings
-2 cups canned chickpeas, drained and rinsed
-1/4 cup diced red onion
-1 clove garlic, roughly chopped
-Cumin*
-Coriander*
-Paprika*
-Salt and pepper
-Canola oil
-2 pita pockets
-Yogurt-dill sauce, for garnish

*I eyeball my spices, but I probably used about 1/2 teaspoon cumin and 1/4 teaspoon each of the coriander and paprika. Just taste as you go and see if the mixture needs more of something.

Directions:
1.) Place all ingredients except for canola oil in a food processor. Pulse until well mixed and mostly smooth.
2.) Form chickpea mixture into small patties (it should make about 6-7 patties).
3.) Pour canola oil into a large frying pan, about an inch high from the bottom of the pan. Heat over medium to high heat. Once hot, place chickpeas in the oil and cook until golden brown, about 3-5 minutes. Flip and cook on the opposite side for an additional 3 minutes, or until golden brown.
4.) Place 3-4 chickpea fritters in each pita pocket. Add your favorite falafel toppings (we added sliced beets). Drizzle each pita with the yogurt-dill sauce. Enjoy!


Chickpea Fritters | The Economical Eater

I highly recommend doubling this recipe so you have leftovers the next day. I loved the flavorful chickpea fritters - full of "warm" spices - mixed with the cold, sweet beets and creamy yogurt-dill sauce. It was a fabulous combination!

What would you make with leftover yogurt-dill sauce?


Friday, October 11, 2013

Jalapeno Dirty Martini

It's probably pretty clear by now that I like drinking...and that my favorite cocktails are spicy cocktails (as seen here, here, and here). Well folks, this new recipe I whipped up last weekend is no different. 

I love a good dirty martini, but I love dirty martinis even more when they have a little something extra in them - whether it be cheese-stuffed olives or jalapeno-stuffed olives. And since we always have a jar of pickled jalapenos in our fridge, I decided to experiment. 

Jalapeno Dirty Martini | TheEconomicalEater.com

Jalapeno Dirty Martini
Yields: 1 cocktail
-3 ice cubes
-3 ounces jalapeno flavored vodka (I used Stoli)
-1 ounce extra dry vermouth
-3/4 ounce olive juice (from olive jar)
-3/4 ounce jalapeno juice (from pickled jalapeno jar)
-3 olives and 2 pickled jalapenos for garnish

Directions:
1.) Place ice cubes in a martini shaker. Add everything but the olives and jalapenos, and shake for 10-15 seconds. Pour in a cold martini glass.
2.) Place olives and jalapenos on a toothpick; drop into martini. Cheers!

Spicy, smooth, and strong, this was a great way to kick off my weekend.

Are you a fan of spicy cocktails?


Tuesday, October 8, 2013

Spiced Ginger Shortbread

For me, fall baking must include two essential ingredients: butter and garam masala. Butter is an obvious one, but garam masala is such a "warm" spice - it combines comforting spices like coriander, cardamom, cumin, cinnamon, and cloves, to name a few. It just works in baked goods (especially my Pumpkin Chocolate Chip Bars) this time of year.

Last week, on a particularly perfect fall day, I was in the mood to bake. For some reason, shortbread was calling my name, but I knew I wanted to put a fall twist on the classic recipe. And that's how these cookies were born.

Spiced Ginger Shortbread | The Economical Eater

Spiced Ginger Shortbread
Yields: 36 cookies
Adapted from Martha Stewart
-2 sticks plus 6 tablespoons unsalted butter, room temperature (plus more for pan)
-2/3 cup granulated sugar
-3/4 teaspoon salt
-2 teaspoons garam masala
-1 teaspoon ground ginger
-3/4 teaspoon vanilla extract
-3 1/3 cups all-purpose flour

Directions:
1.) Preheat oven to 275 degrees. Butter a 9 x 13 baking dish, and line bottom with parchment paper. In the bowl of an electric mixer fitted with a paddle attachment, cream butter and sugar on medium speed until light and fluffy (about 2 minutes). Add salt, garam masala, ginger, and vanilla, and beat to combine.
2.) Add flour, 1 cup at a time, beating on low speed until just combined.
3.) Press dough into prepared pan, leveling and smoothing the top. Using a dough scraper or knife, cut dough lengthwise into nine strips, each slightly less than 1-inch wide. Cut the strips crosswise into 36 3-inch bars. Sprinkle with granulated sugar.
4.) Bake shortbread until lightly golden, but not browned, 70 to 85 minutes. Transfer pan to a wire rack to cool. Remove parchment, turn shortbread over, and break or cut with a serrated knife into bars. Store in an airtight container for up to 1 month.

[Print this recipe]

Buttery and full of my favorite fall flavors - ginger, cinnamon, cloves, even cumin - these are some dangerous cookies. Paired with a mug of hot coffee, they're addictive. They will definitely not last the entire month in our house!

What are your favorite fall flavors?


Wednesday, September 18, 2013

Rosemary Beer Biscuits

Working from home on Friday afternoons is always dangerous. When 3 p.m. rolls around, I usually still have work to do...but having a beer while finishing the day seems like it would be OK. Thankfully, I've yet to give in to this craving - except for last Friday, when I decided to bake with beer (and finish off the bottle, as I hate wasting).

My idea to bake with beer was inspired by this recipe. Our rosemary plant was also an inspiration, as it is one of the few herbs that actually decided to grow this year (or, that the wild rabbit decided not to eat) - and I seriously can't get enough of the stuff. The smell of rosemary alone is borderline magical.


The beer I used for this was Heavy Seas' Gold, but I highly recommend using a wheat beer if you have one.


Ready to see how easy this recipe is?


Rosemary Beer Biscuits
Yields: 8 biscuits
Adapted from The Beeroness
-2 cups all-purpose flour
-1/2 teaspoon salt
-1 teaspoon black pepper
-1/2 teaspoon baking powder
-1/2 teaspoon baking soda
-1 teaspoon sugar
-1 tablespoon chopped fresh rosemary
-1 stick cold butter, cut into small cubes
-1/2 cup beer (preferably wheat beer)
-1 tablespoon shredded white cheddar
-Sea salt and extra black pepper, for sprinkling (I used Soluna Garden Farm's Rosemary Salt)

Directions:
1.) Preheat oven to 350 degrees.
2.) Put the flour, salt, pepper, baking powder, baking soda, sugar, and rosemary in a food processor and pulse until combined. Add butter cubes and process until the butter is evenly distributed, about 1-2 minutes. (I ended up working some of the butter into the mixture with my hands after 1 minute).
3.) Move to a bowl and add the beer and cheese and stir until combined. (You may have to add a little more beer to make the dough stick - add 1 teaspoon at a time until you have the right consistency, if needed).
4.) Dump the dough onto a floured surface. Squish together with your hands to form a ball and then flatten into a rectangle about 6 inches wide and 10 inches long and 2 inches high. Use a sharp knife to cut the biscuits into squares. You can make the biscuits as big or small as you want, but this recipe will make about 8 average-sized biscuits.
5.) Place the biscuits on a baking sheet covered with parchment paper. Sprinkle the top with a bit of sea salt and pepper.
6.) Bake for 15-18 minutes or until light golden brown.

[Print this recipe]


These biscuits turned out perfectly flaky and buttery, and were so simple to make. Plus, you end up with a few sips of beer to enjoy after baking...and while finishing up work, in my case. ;)


 Have you ever baked with beer before?